Virtual Machine
A Virtual Machine (VM) is a software-based computer that runs inside a physical server using virtualization technology. It behaves like a real computer with its own operating system, CPU, memory, and storage.
Using a Virtual Machine platform such as VMX, users can create, manage, and run multiple virtual servers on a single physical machine. Each VM works independently, allowing applications and services to run securely without affecting other virtual machines.
This helps organizations efficiently use hardware resources, improve scalability, and simplify server management in cloud or virtualized environments.
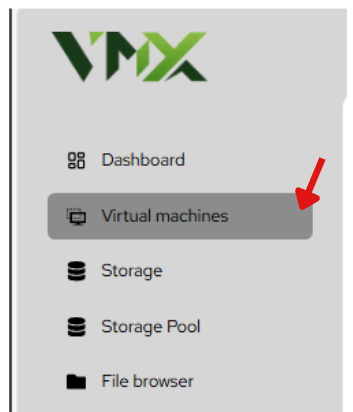
Steps To Follow:
- Click on Virtual Machines menu from the list. It will navigate you to the Virtual Machines page.
Create Virtual Machine
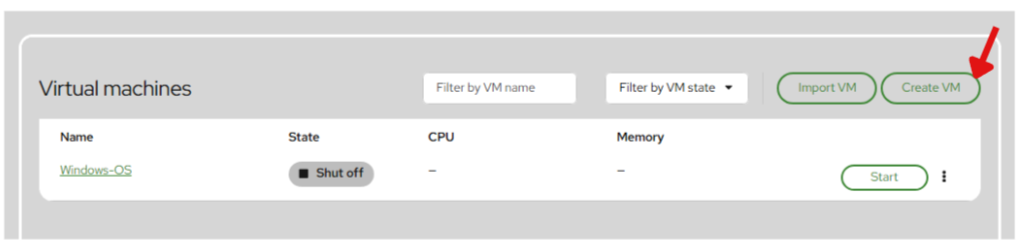
Steps To Follow:
1. Click on Create VM menu from the list. It will navigate you to the Virtual Machines page.
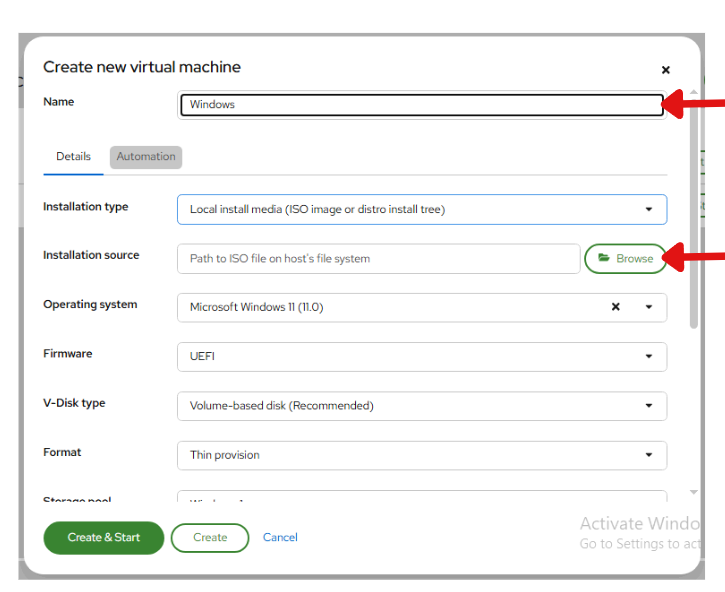
Steps To Follow:
2. Enter a unique Name for your Vm.
3. Click on Browse button from the list. It will navigate you to the file browsing list.
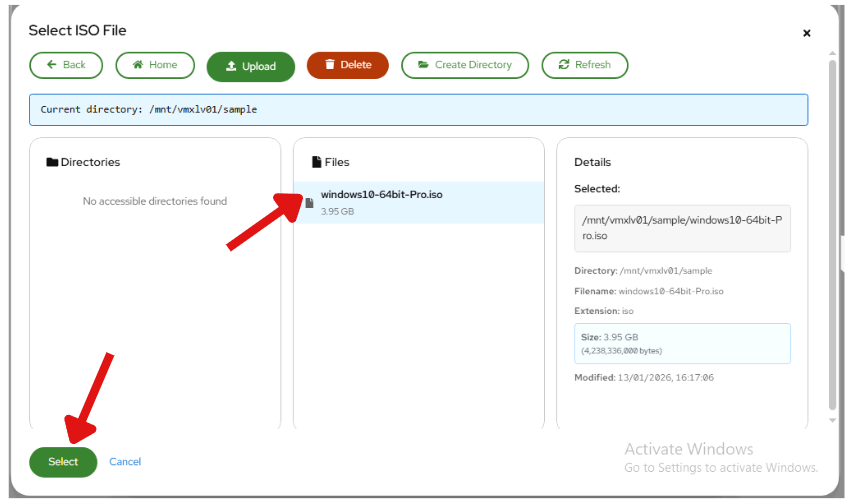
Steps To Follow:
4. Select the ISO file from the list.
5. Click on Select button from the list. It will navigate you to the previous list.
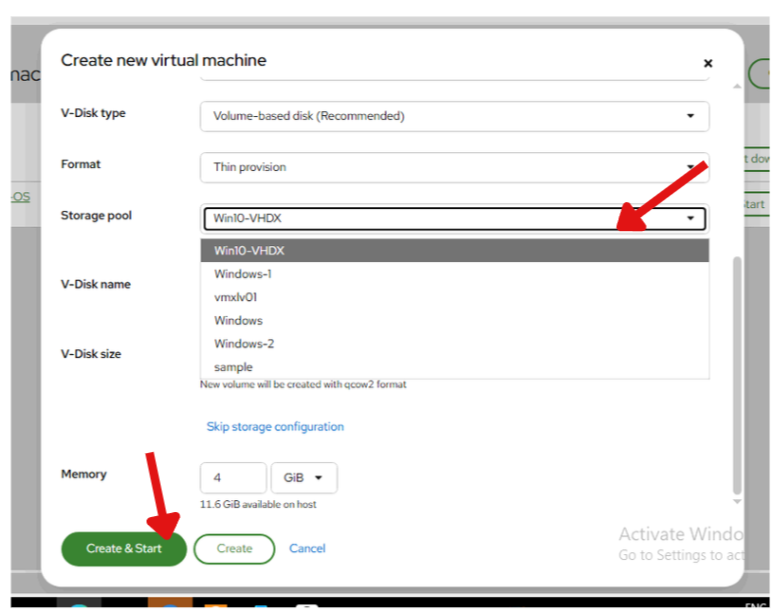
Steps To Follow:
6. Select the Storage Pool from the list.
7. Click on Create & Start button from the list. It will create and start your vm.
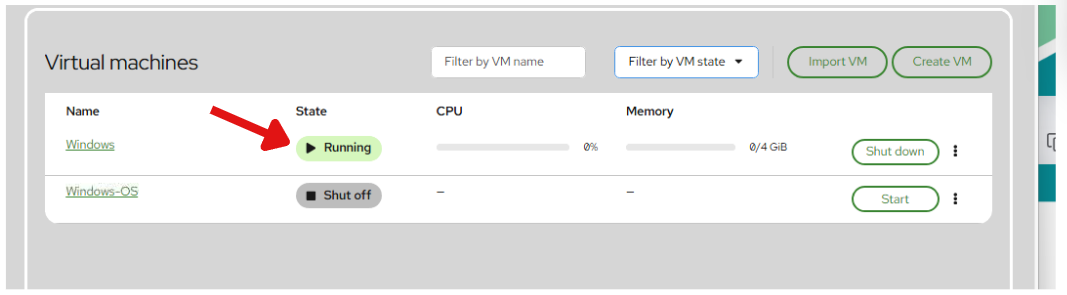
When your vm is created you can see vm is running
Import Virtual Machine
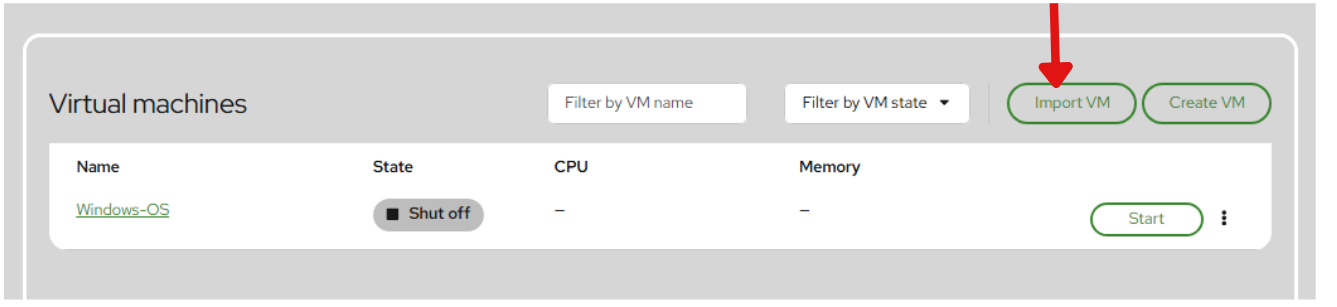
Steps To Follow:
1. Click on Import VM button from the list. It will navigate you to the Import VM page.
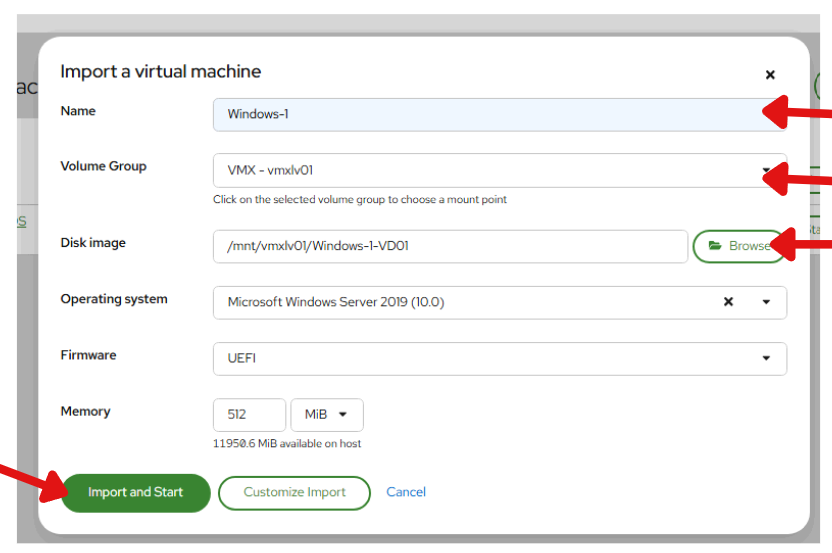
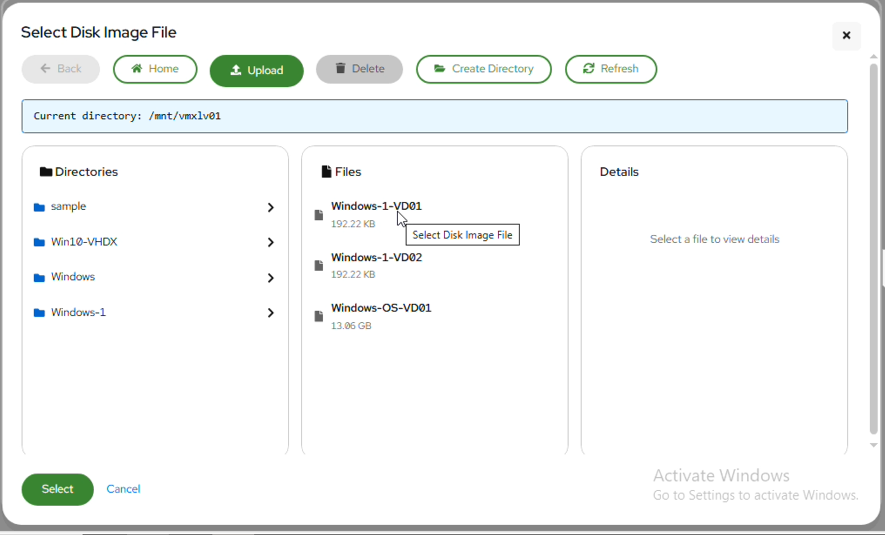
Steps To Follow:
2. Enter a unique Name for your Vm.
3. Click on the selected volume group to choose a mount point
4. Click on “Browse” button from the list. It will navigate you to the file browsing list.
5. Select the Disk Image file from the list.
6. Click on “Select” button from the list. It will navigate you to the previous list.
7. Click on “Import and Start”
Actions (Start State)
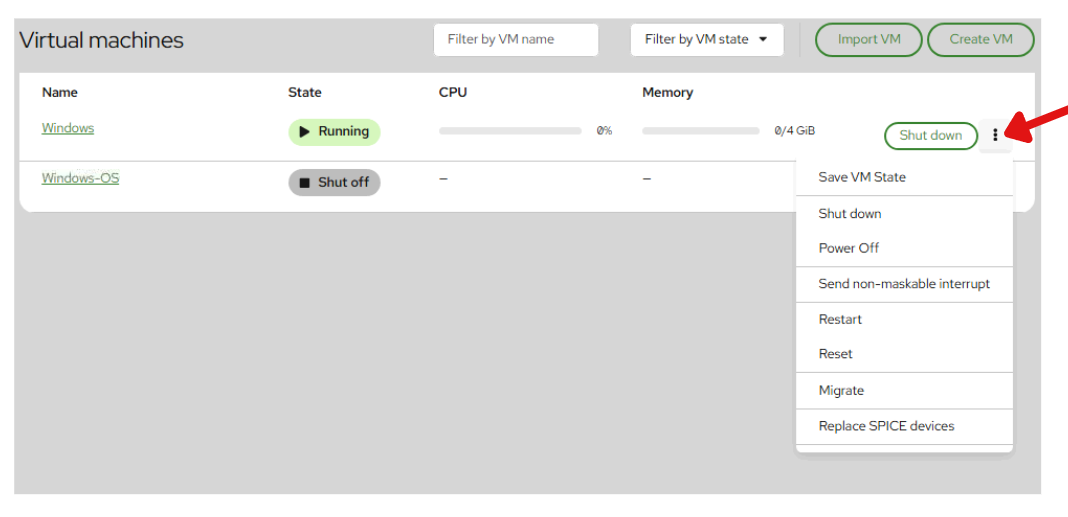
| Action | Description |
|---|---|
| Save VM State | Suspends the VM and saves its current memory to disk so it can be resumed later. |
| Shut down | Sends a clean signal to the guest OS to close all programs and turn off. |
| Power Off | Forces the VM to stop immediately, like pulling the power cord. |
| Send NMI | Sends a Non-Maskable Interrupt (NMI) to the CPU, usually for system debugging. |
| Restart | Sends a signal to the guest OS to perform a graceful reboot. |
| Reset | Forces an immediate reboot of the VM hardware without a clean shutdown. |
| Migrate | Moves the virtual machine from the current host to another server. |
| Replace SPICE devices | Refreshes the virtual display and input drivers for the remote console. |
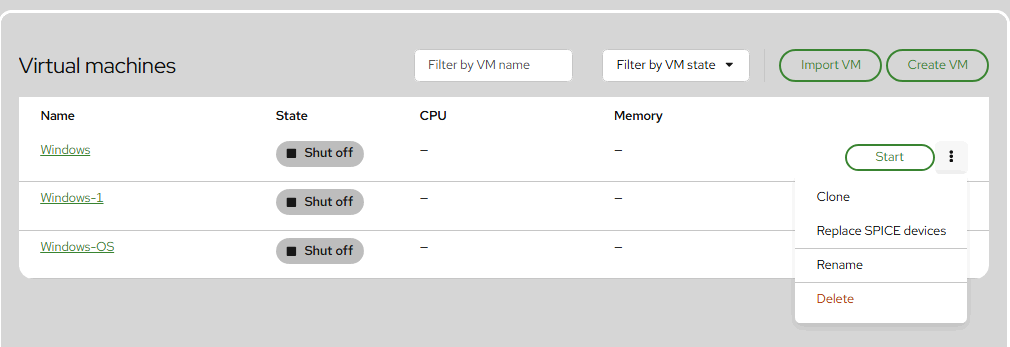
VM Actions (Shut off State)
| Action | Description |
|---|---|
| Start | Powers on the virtual machine and begins execution. |
| Clone | Creates a copy of the virtual machine with the same configuration. |
| Replace SPICE devices | Refreshes the virtual display and input drivers for the remote console. |
| Rename | Allows you to change the name of the virtual machine. |
| Delete | Permanently removes the virtual machine and its associated data. |
Console
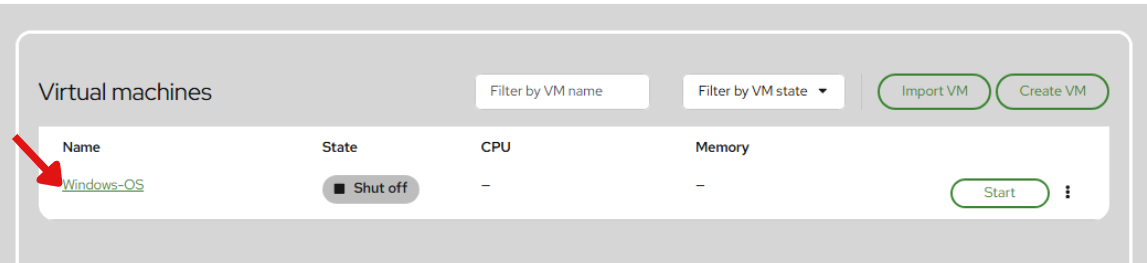
Steps To Follow:
1. Click on VM Name Link from the list. It will navigate you to the Console page.
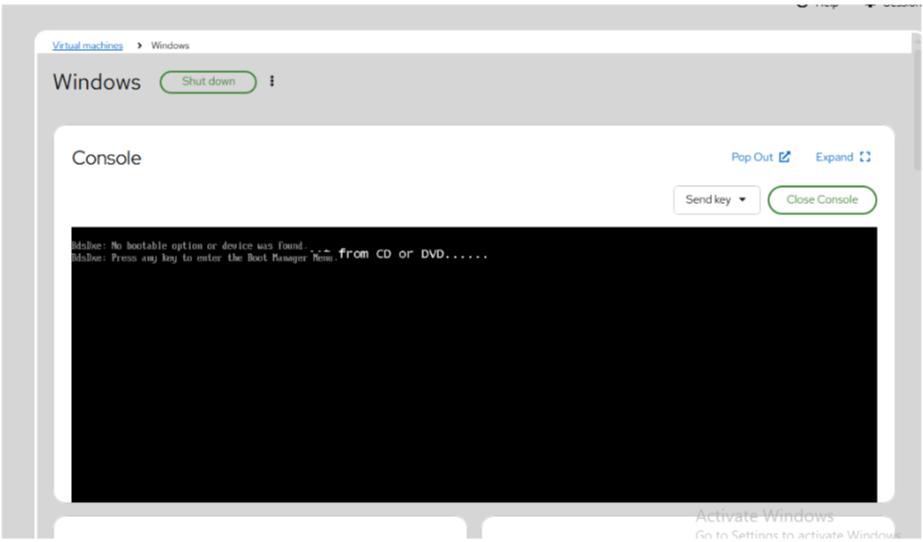
The Console section provides a direct visual interface to the VM, allowing for interaction without needing external SSH or RDP clients.
- Interactive Window: View the boot sequence and OS desktop in real-time.
- Pop Out: Opens the console in a separate browser window.
- Expand: Full-screens the console within the current tab.
- Send Key: Allows sending specific keyboard combinations (like Ctrl+Alt+Del) that your local browser might otherwise intercept.